
Tutorial
Your first Landlord Gas Safety Certificate
Ten quick steps, about two minutes. We’ll walk you through it with the exact screens you’ll see in Checker – no jargon, no guesswork.
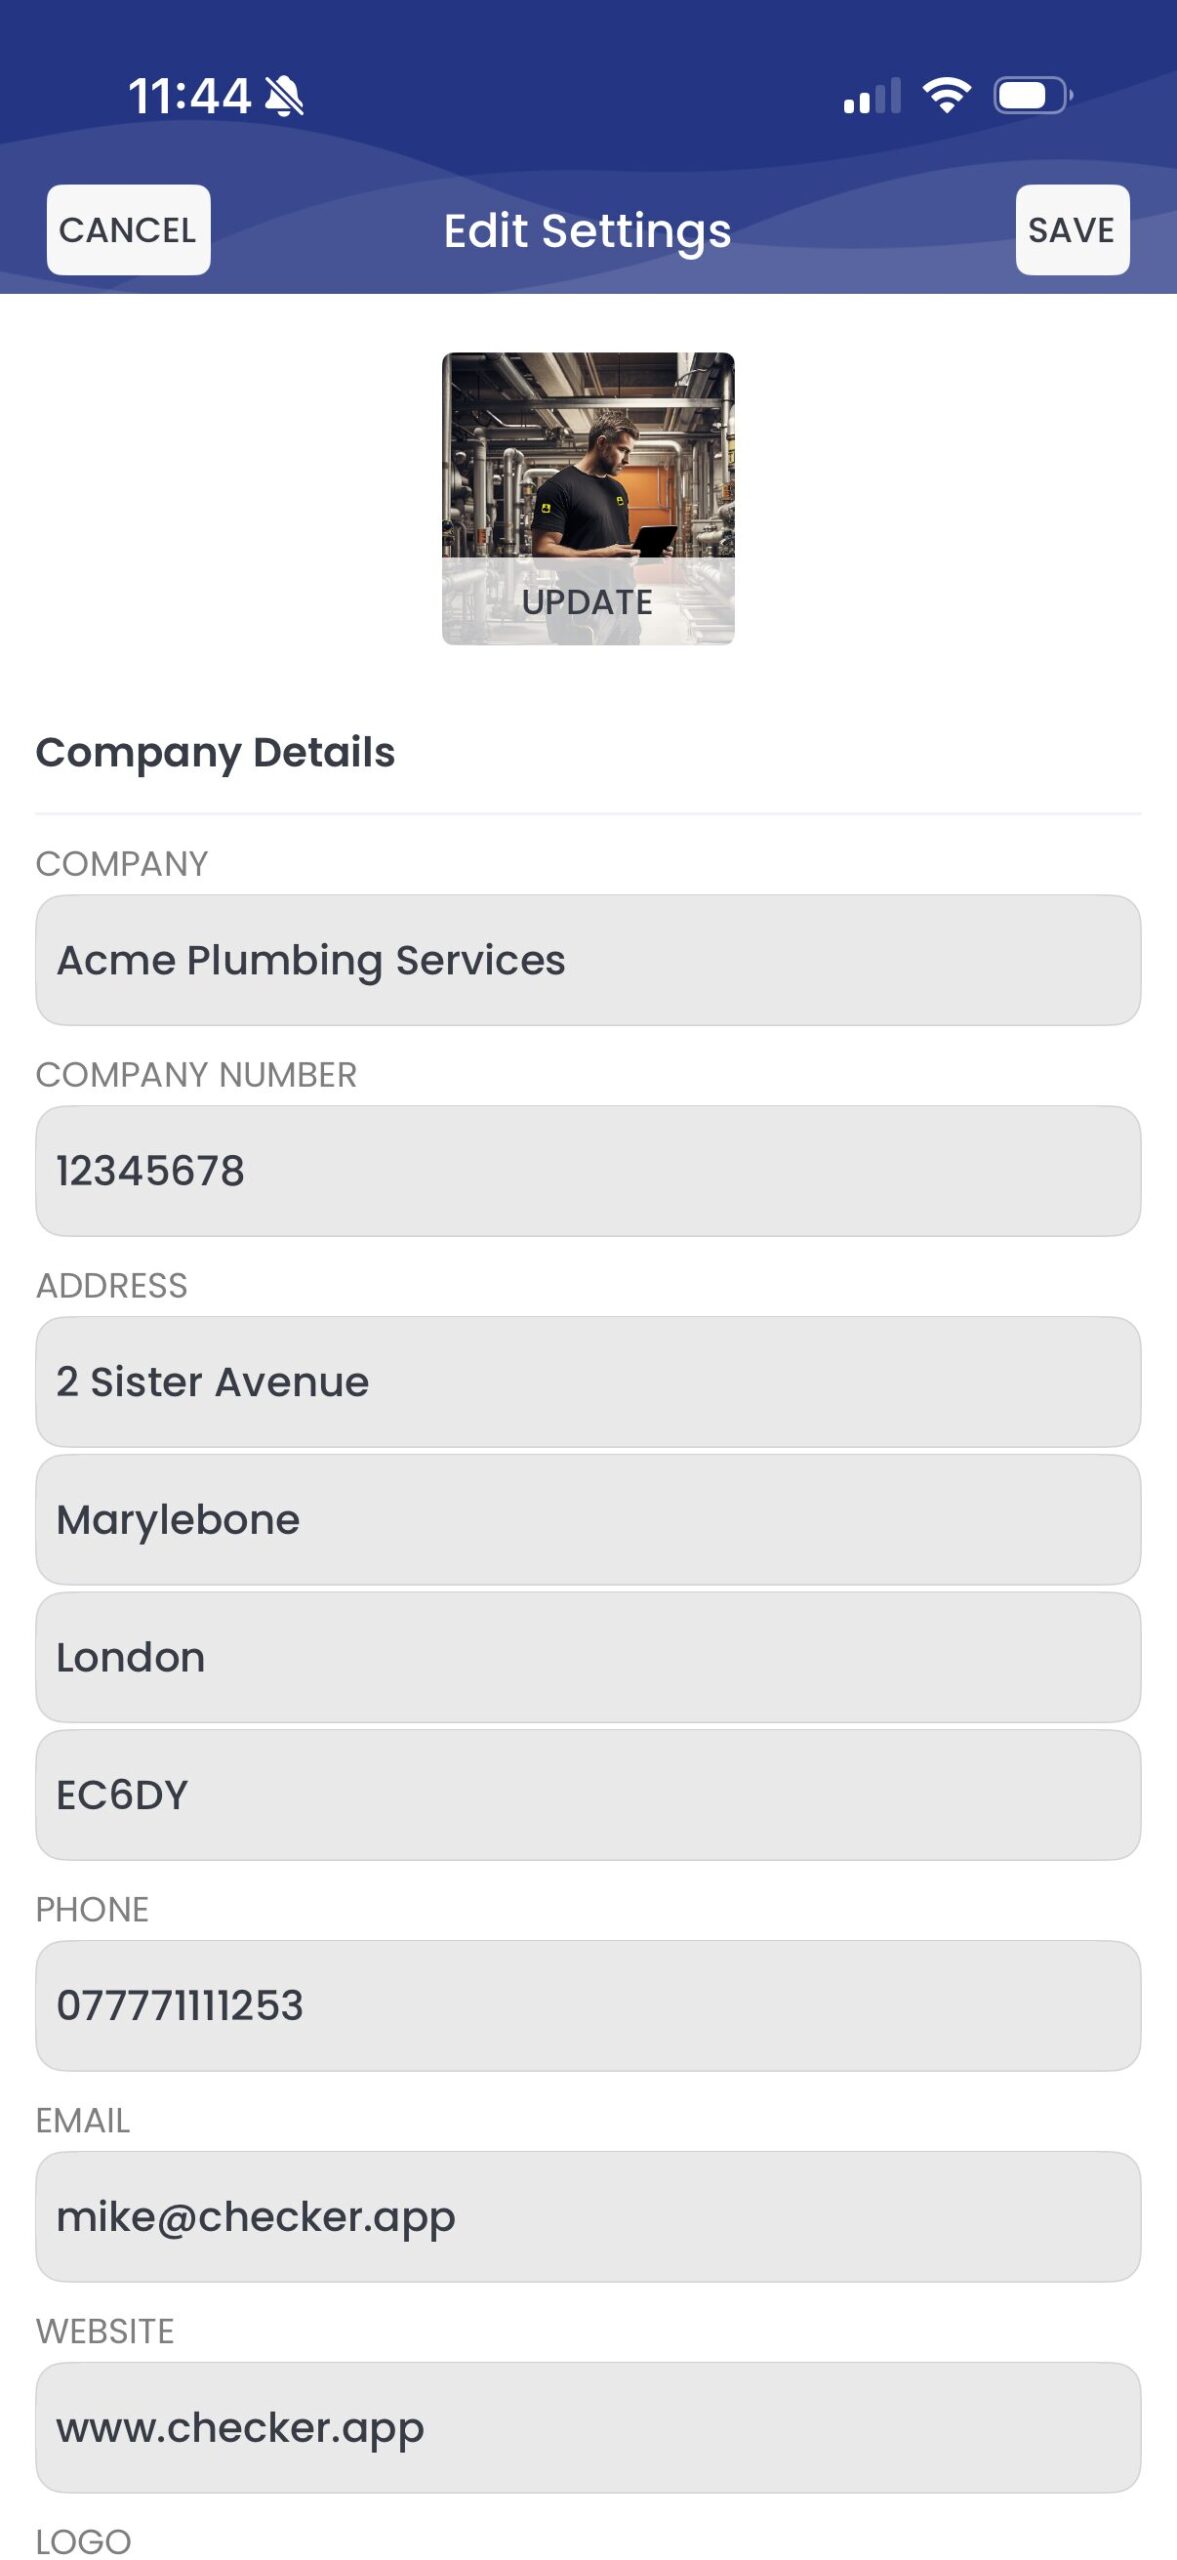
Finish Settings first (one-time, 2 minutes)
Before your first cert, open Settings and tap SAVE in the top right. Set your certificate numbering, VAT status, logo and branding once – every future cert then runs smoothly with no repeat setup.
Add your default settings
One-off job. Open Settings, add your company details, logo, VAT status and certificate numbering, then tap SAVE in the top right. You’ll never have to do it again.
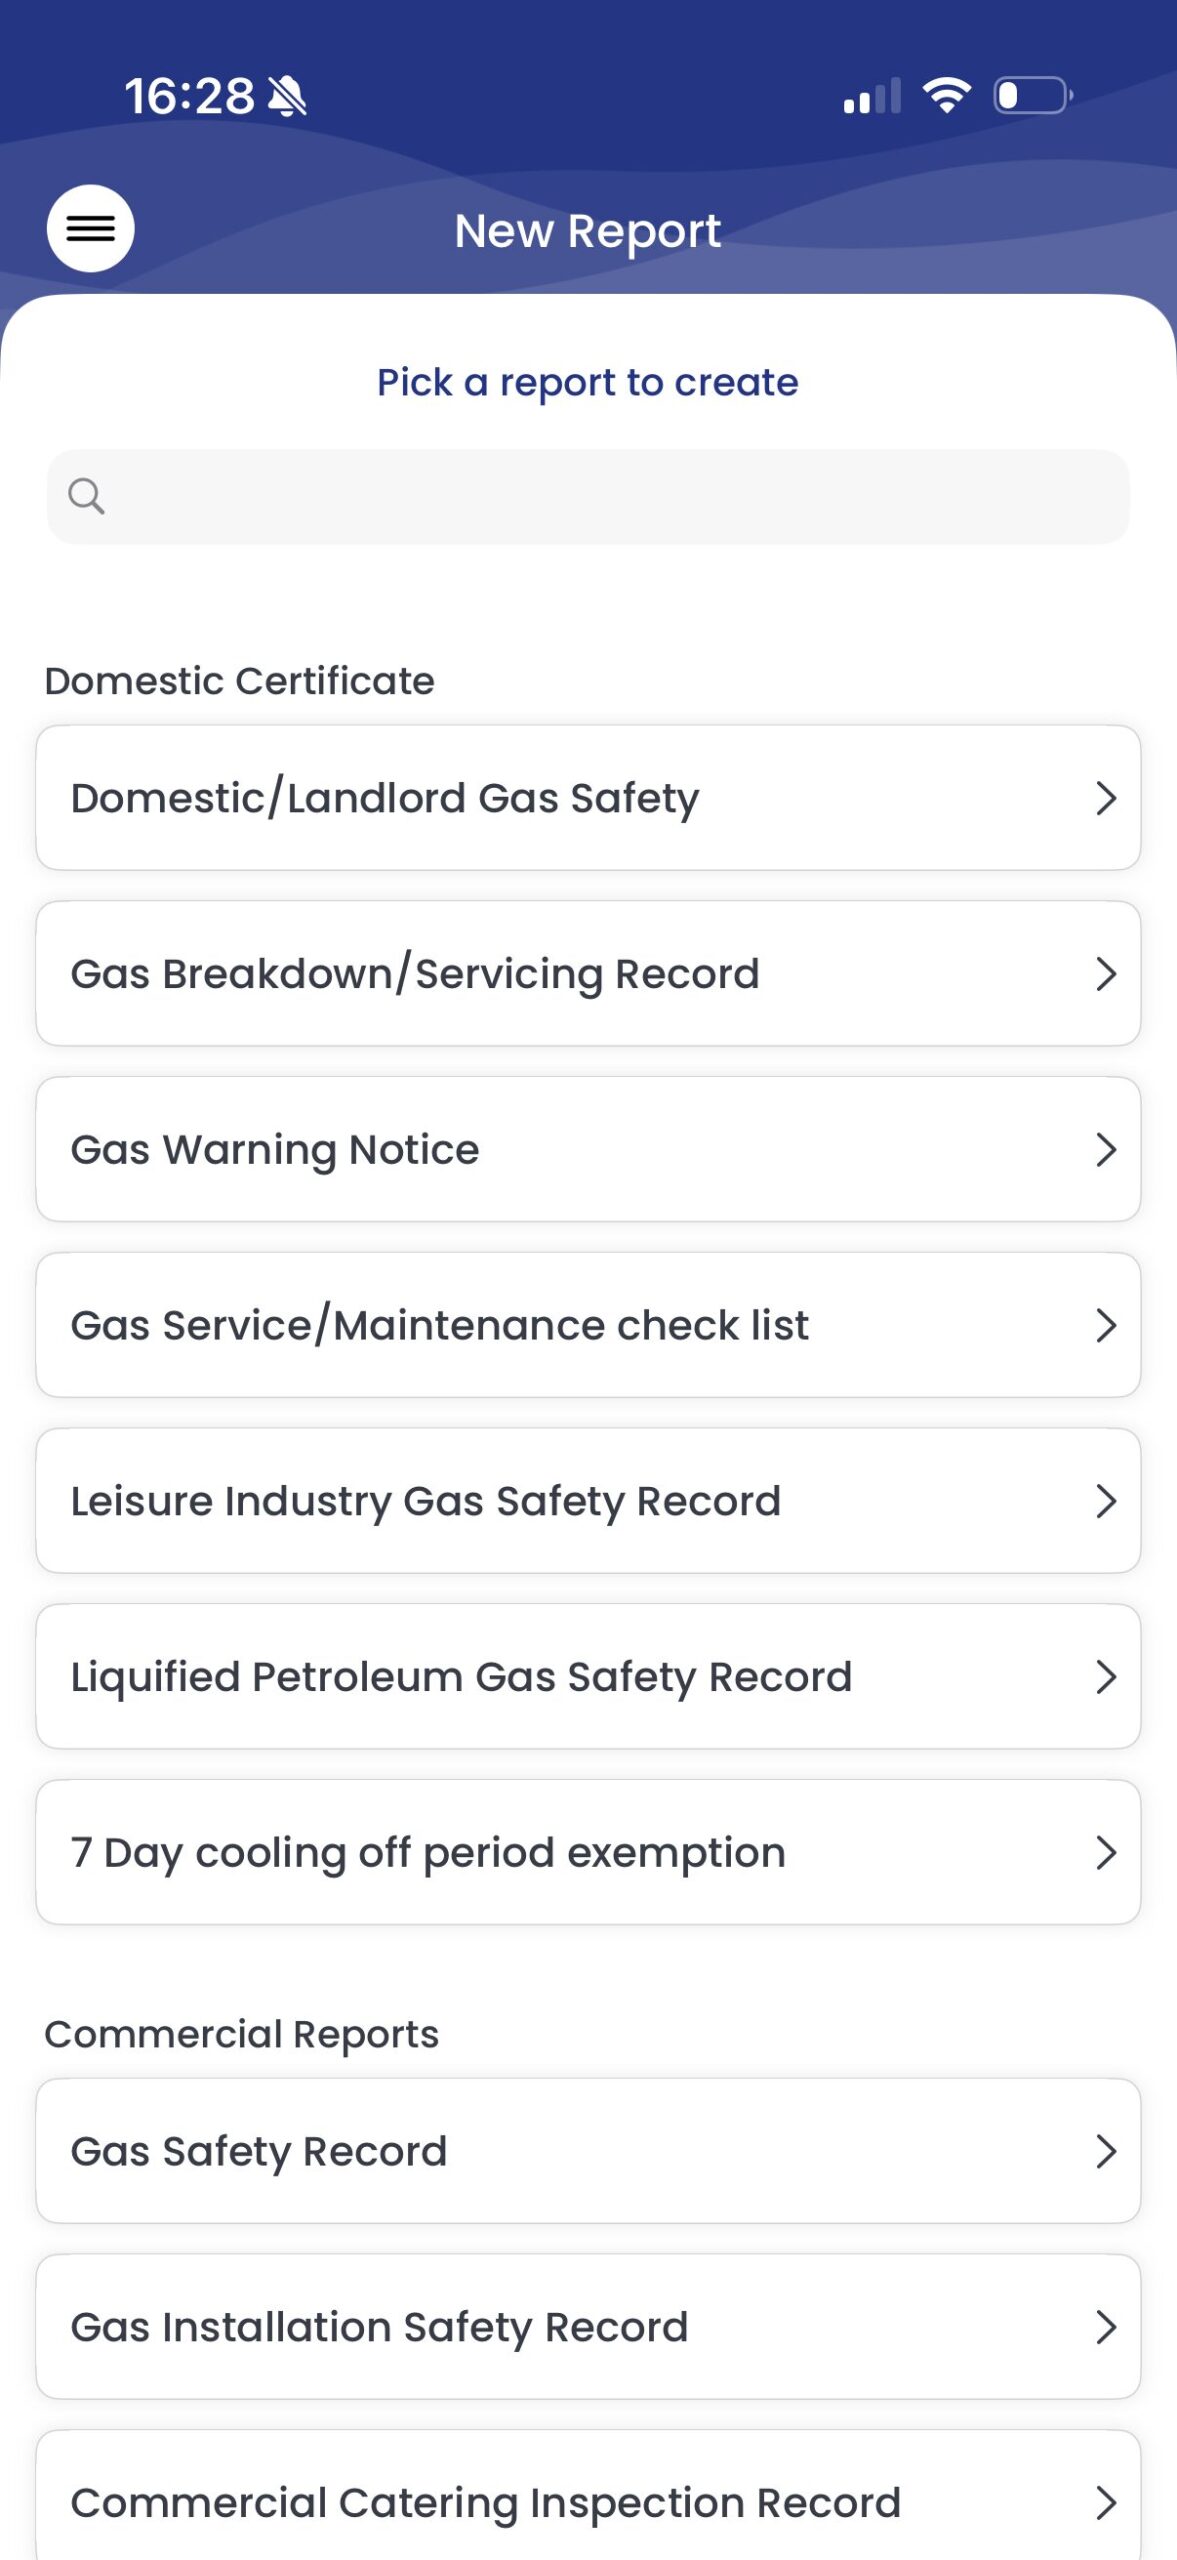
New file, choose the form
Tap New file, then pick Landlord Gas Safety Report from the list.
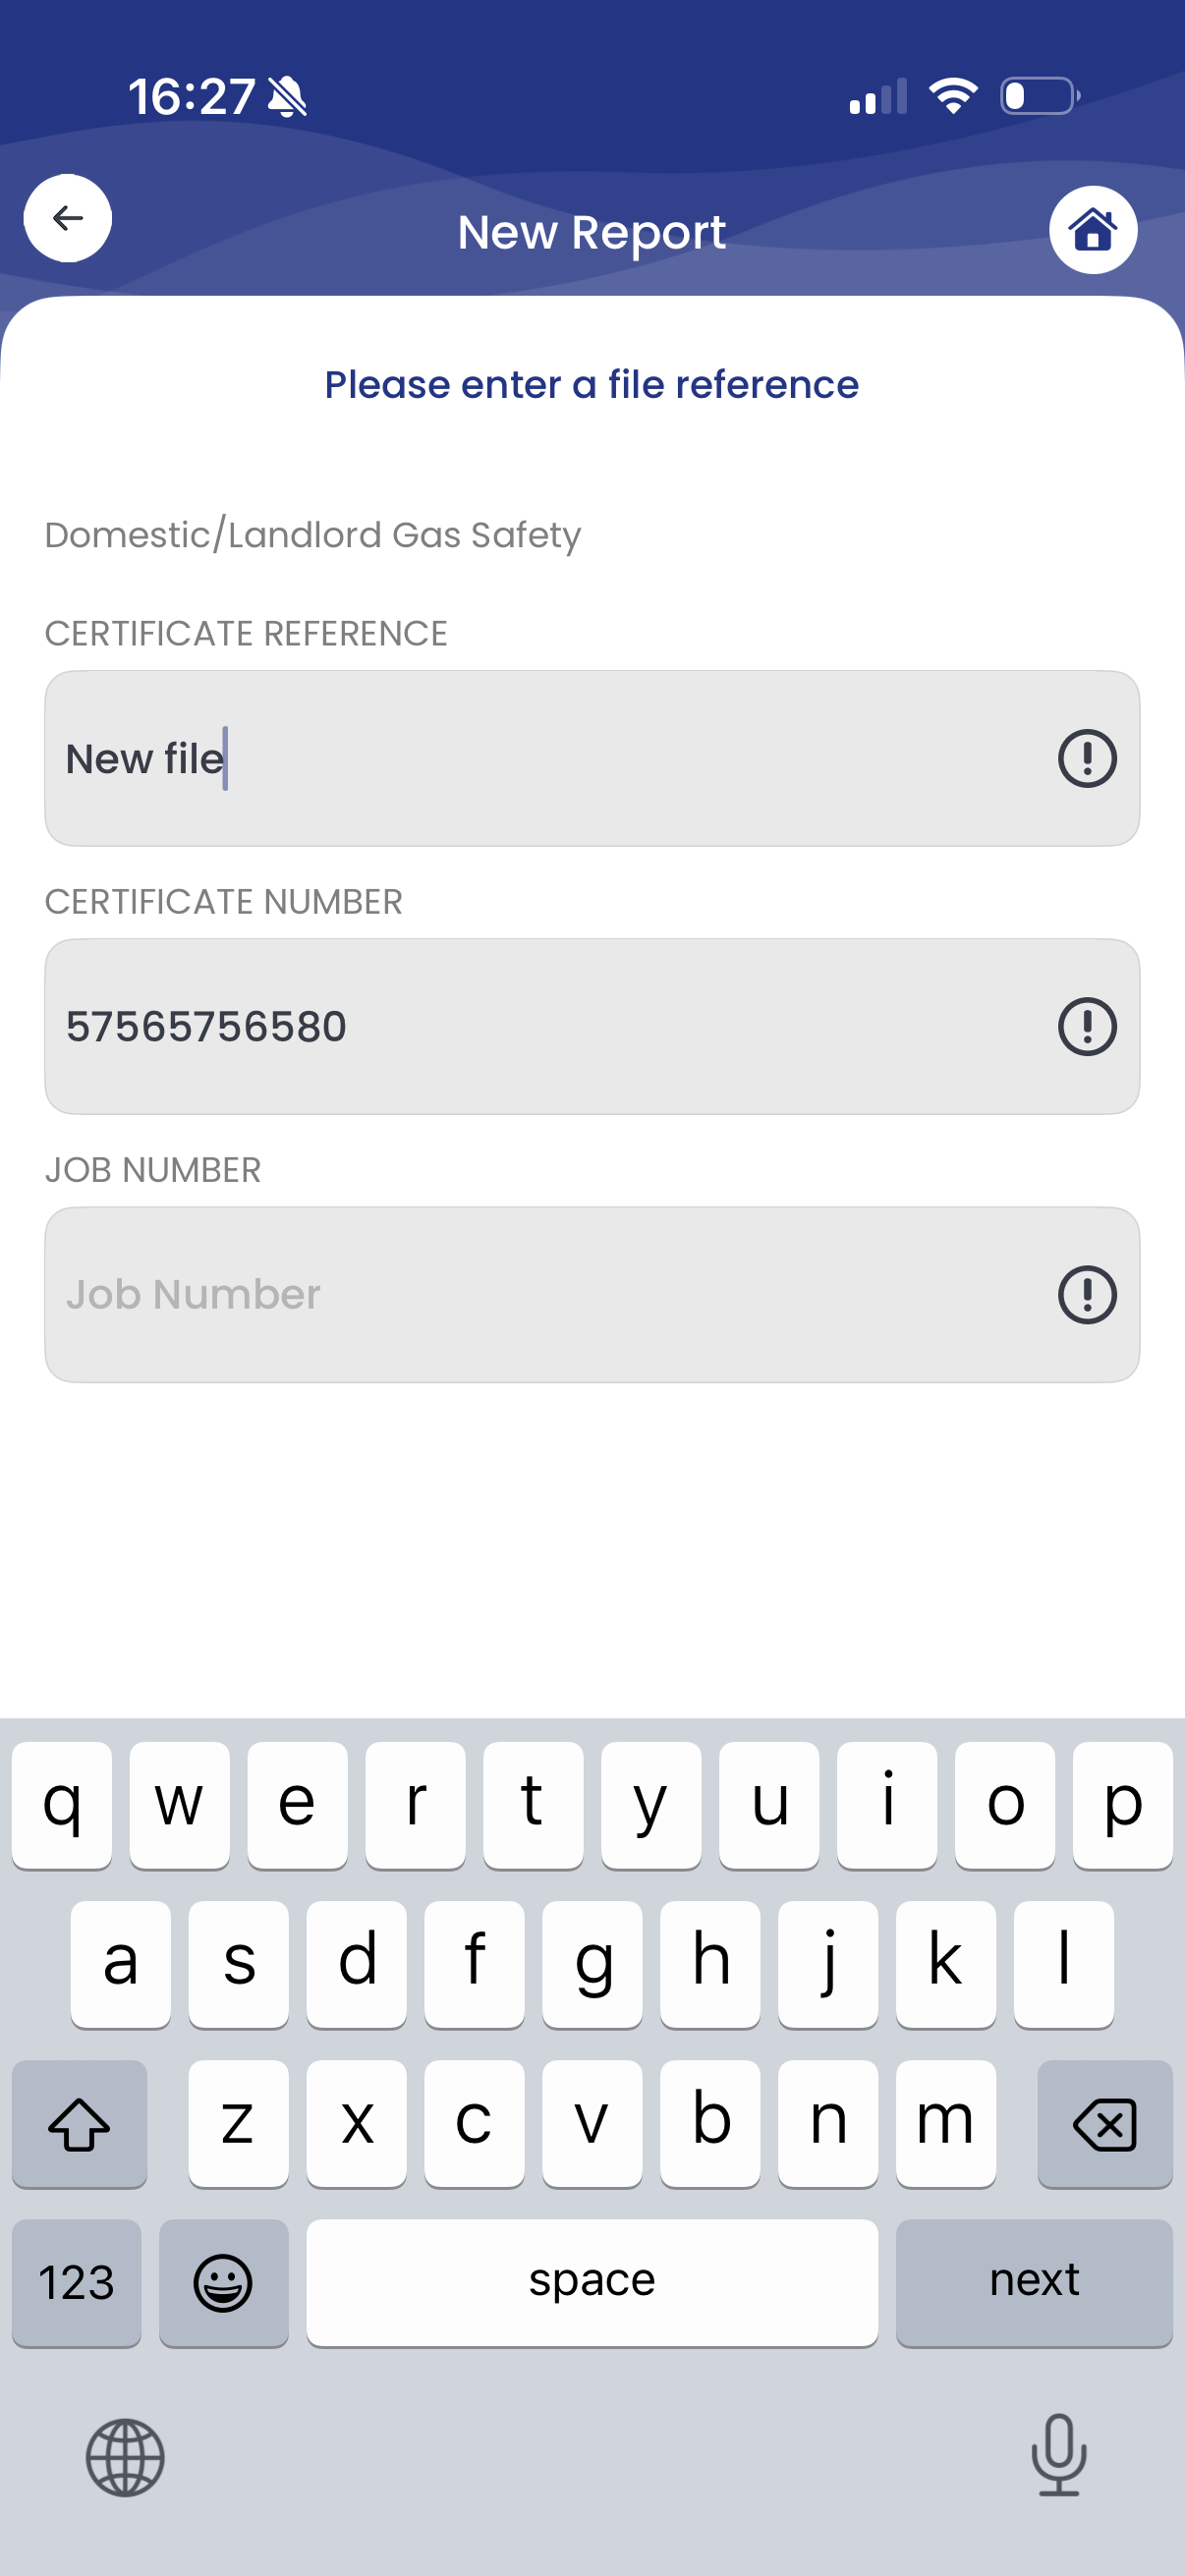
Add a file reference
Give the cert a reference – most engineers use the first line of the address, postcode and year. The certificate number is optional on this same screen, and you can tag a job here too if there’s one booked in.
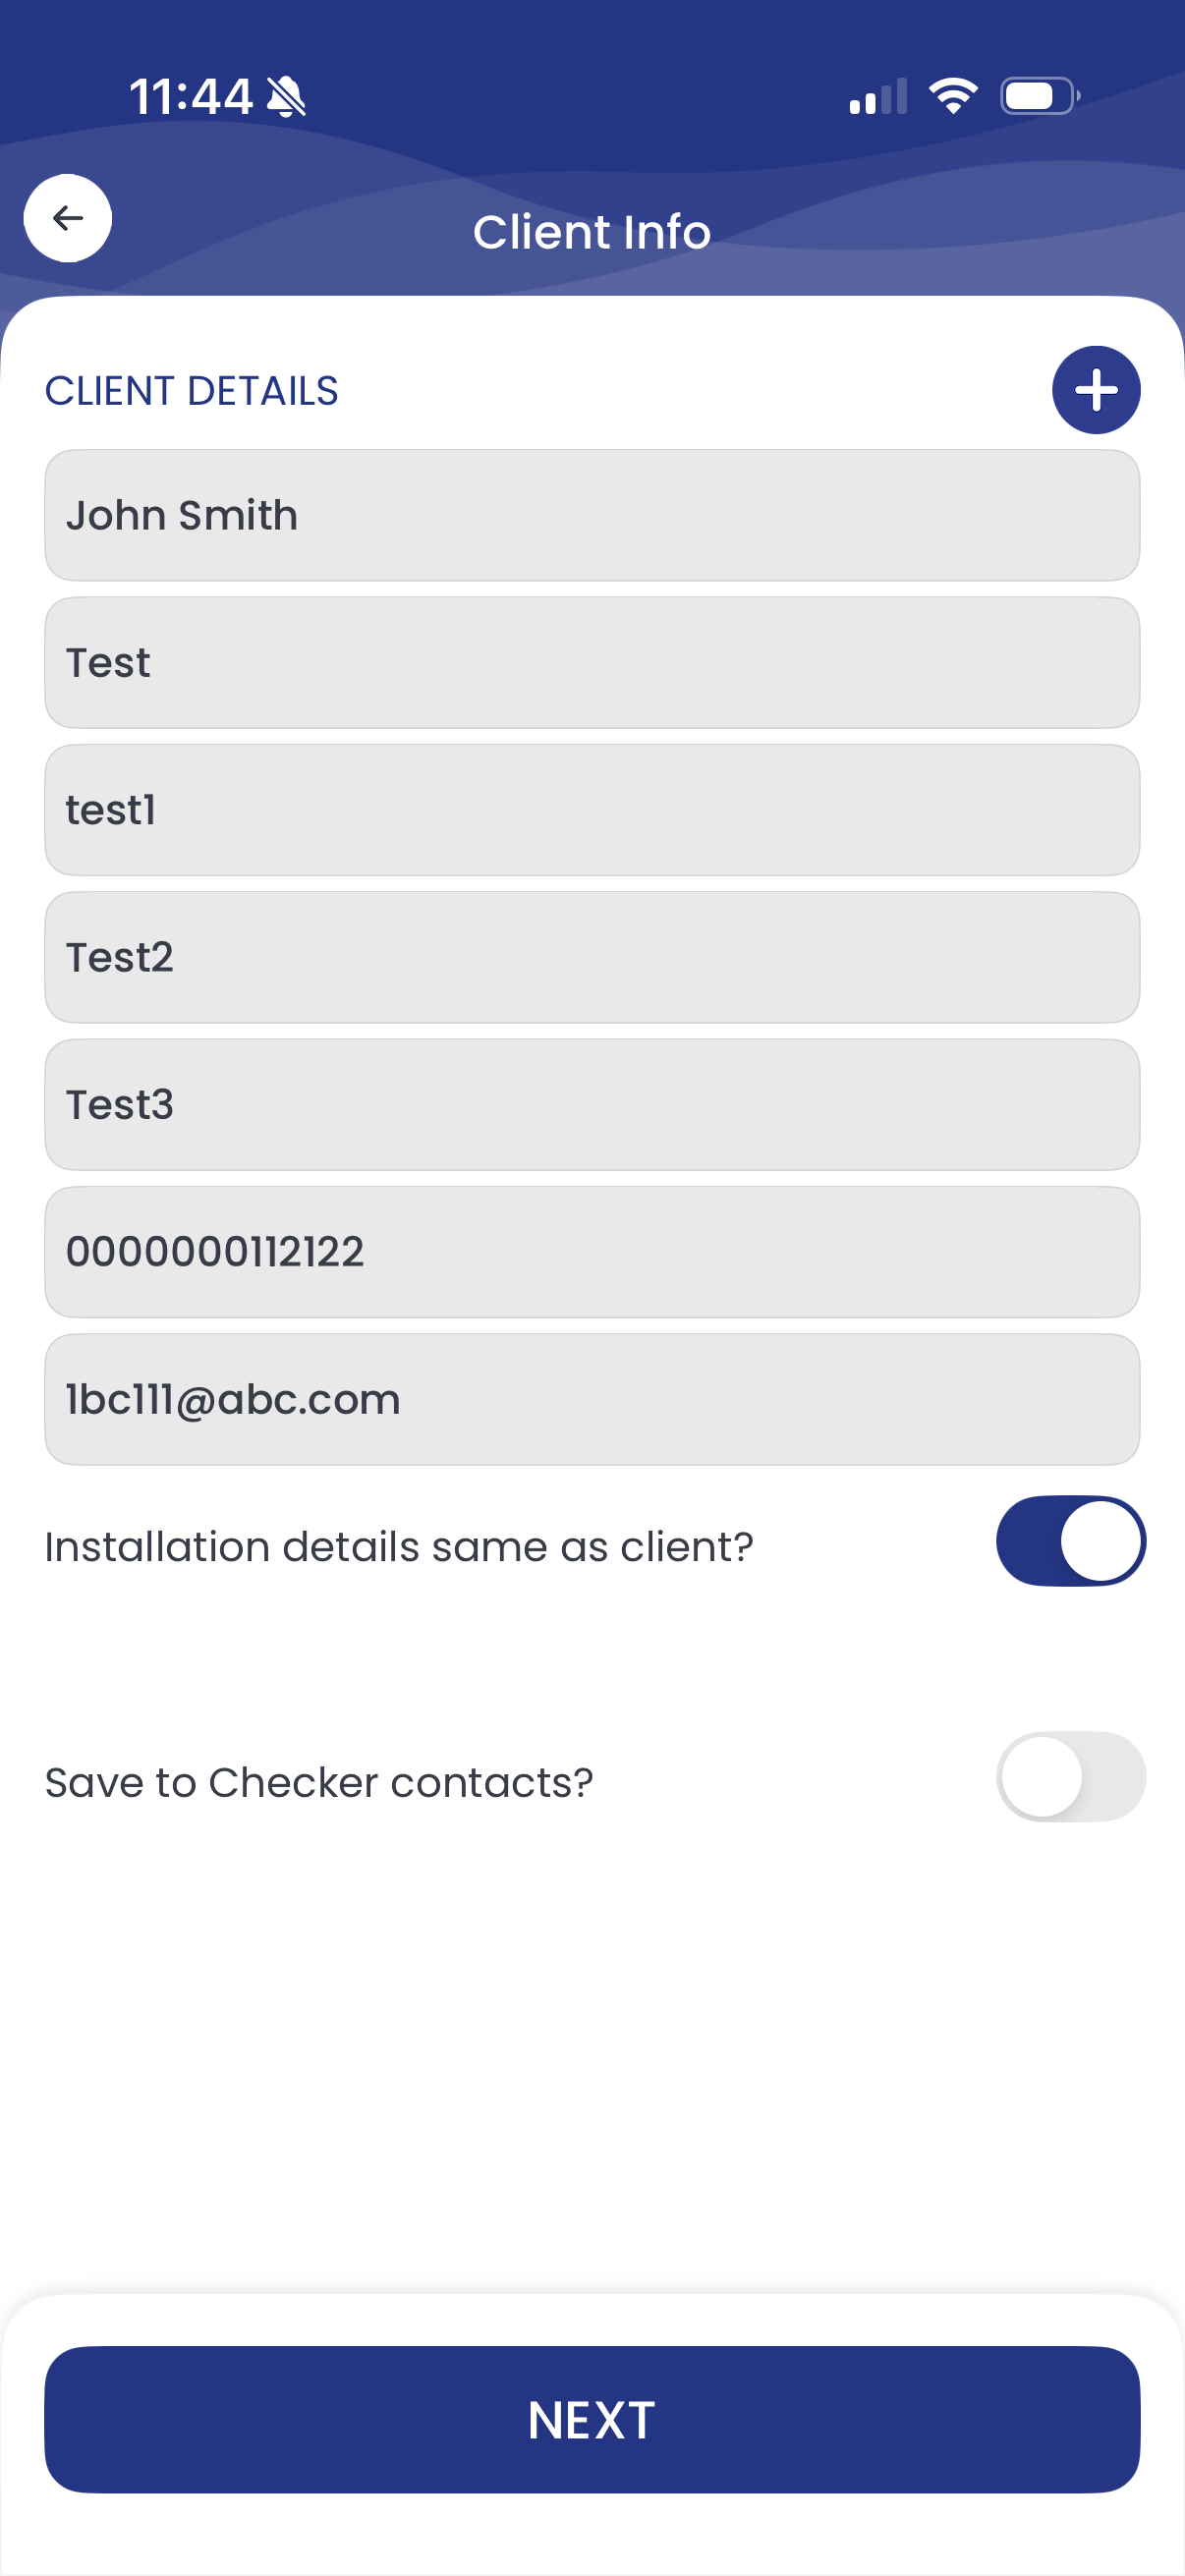
Type in the customer’s details
Name, address, contact details. Everything you type saves automatically to your customer list – next time you start typing that name, the whole record pops straight up.
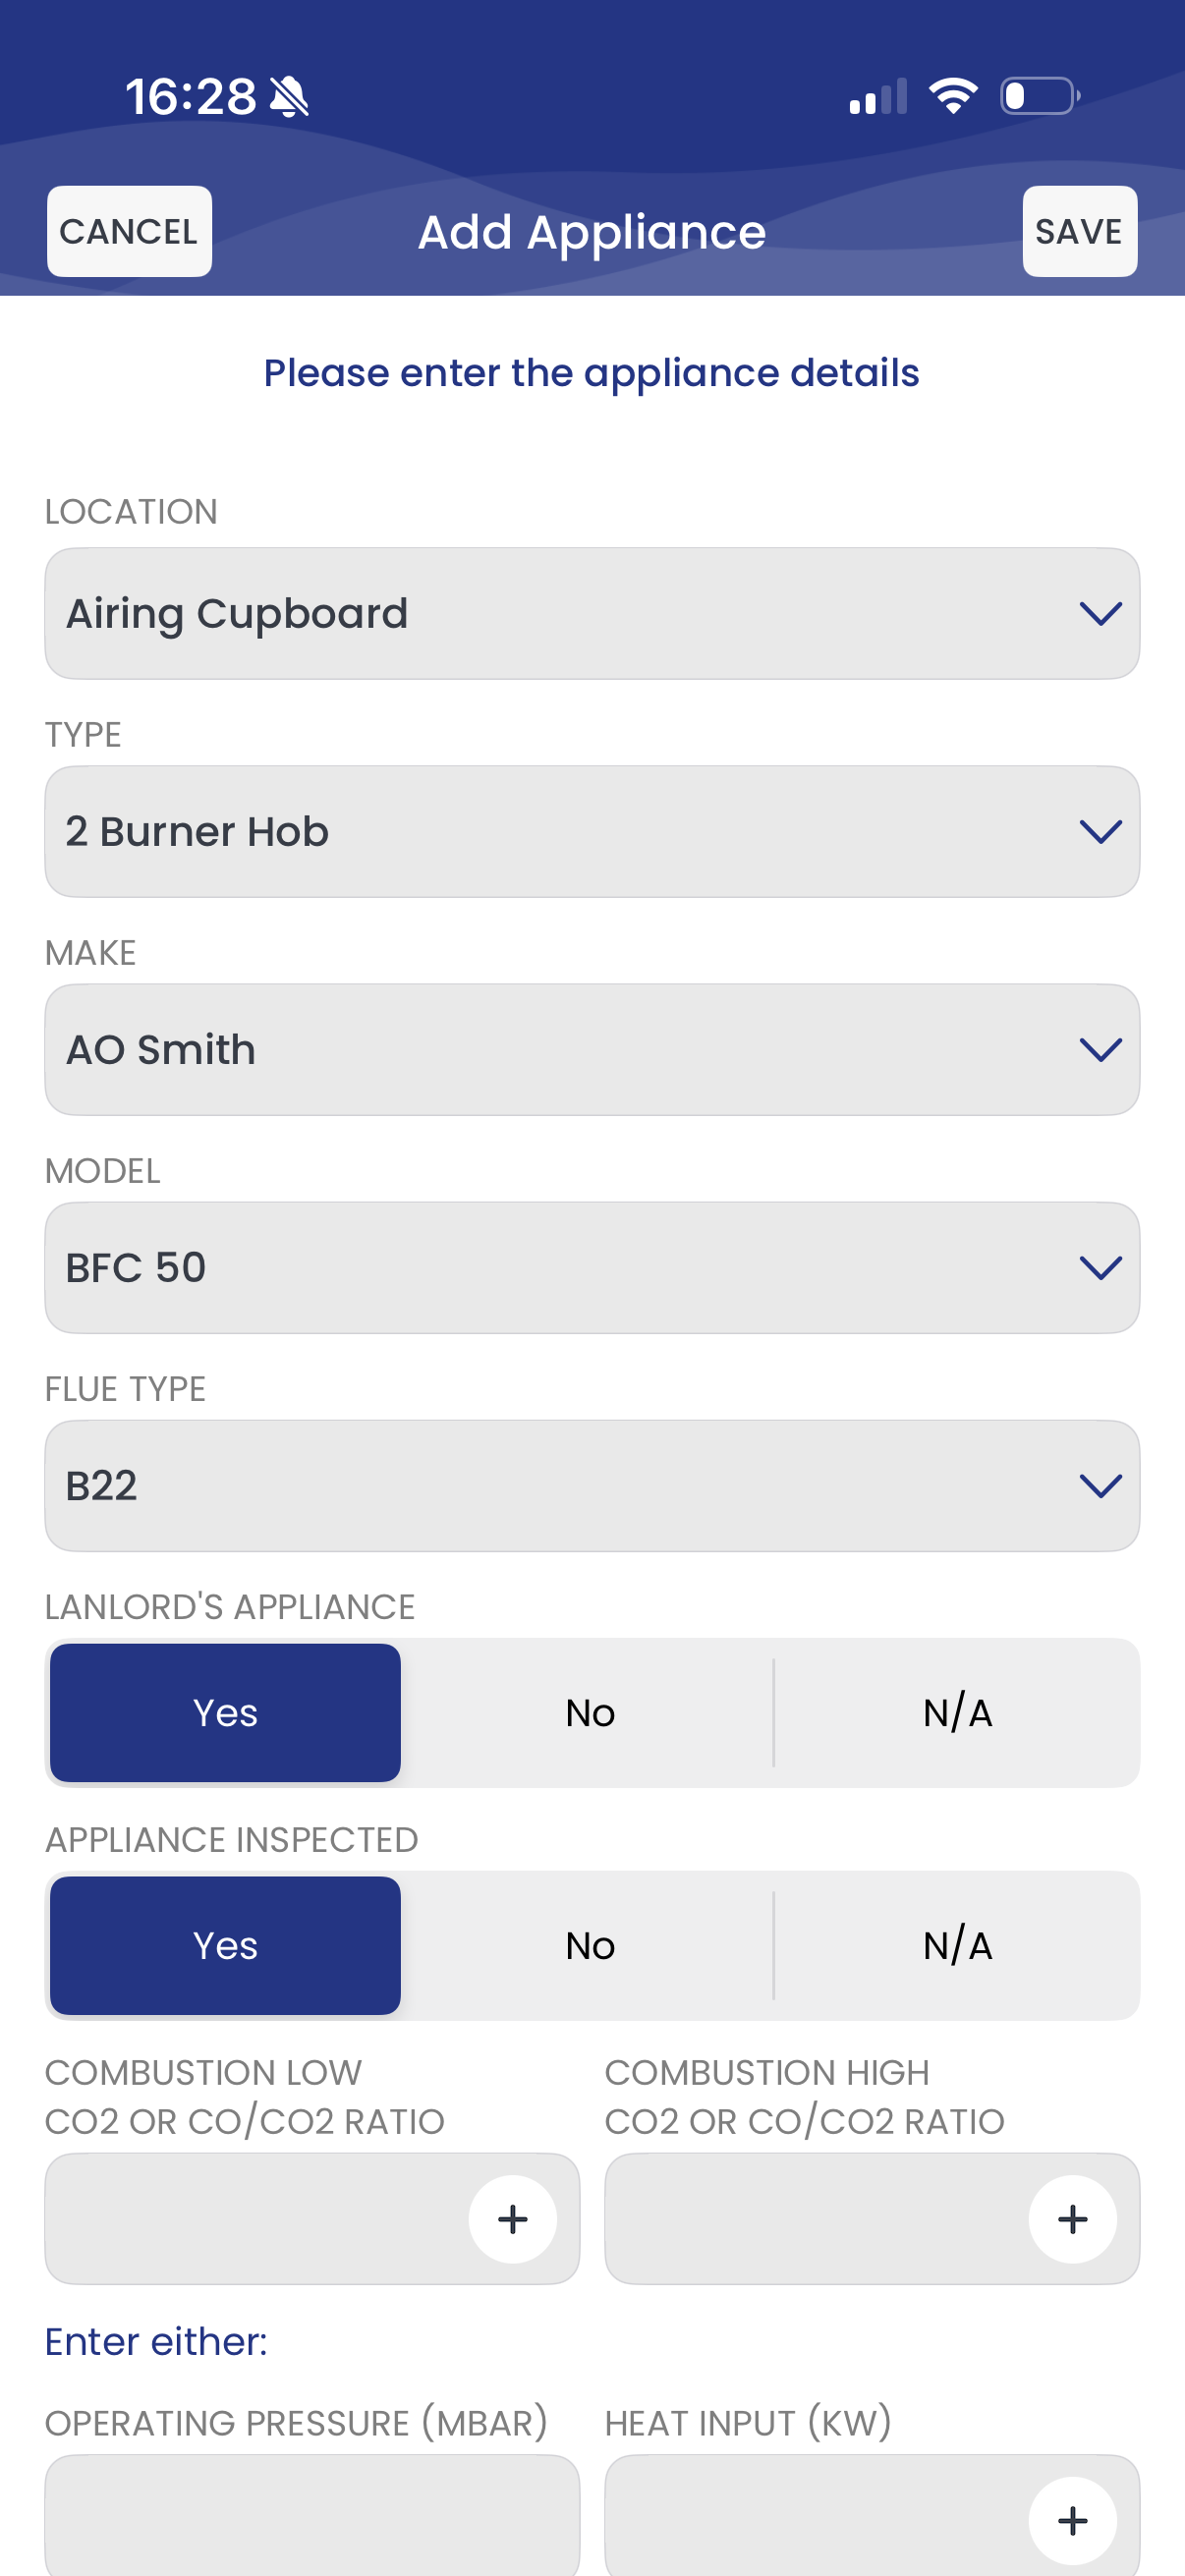
Enter the appliance details
Work through the boiler and any other appliances – make, model, location, readings. Tap values and use the drop-downs; the form only asks what’s relevant.
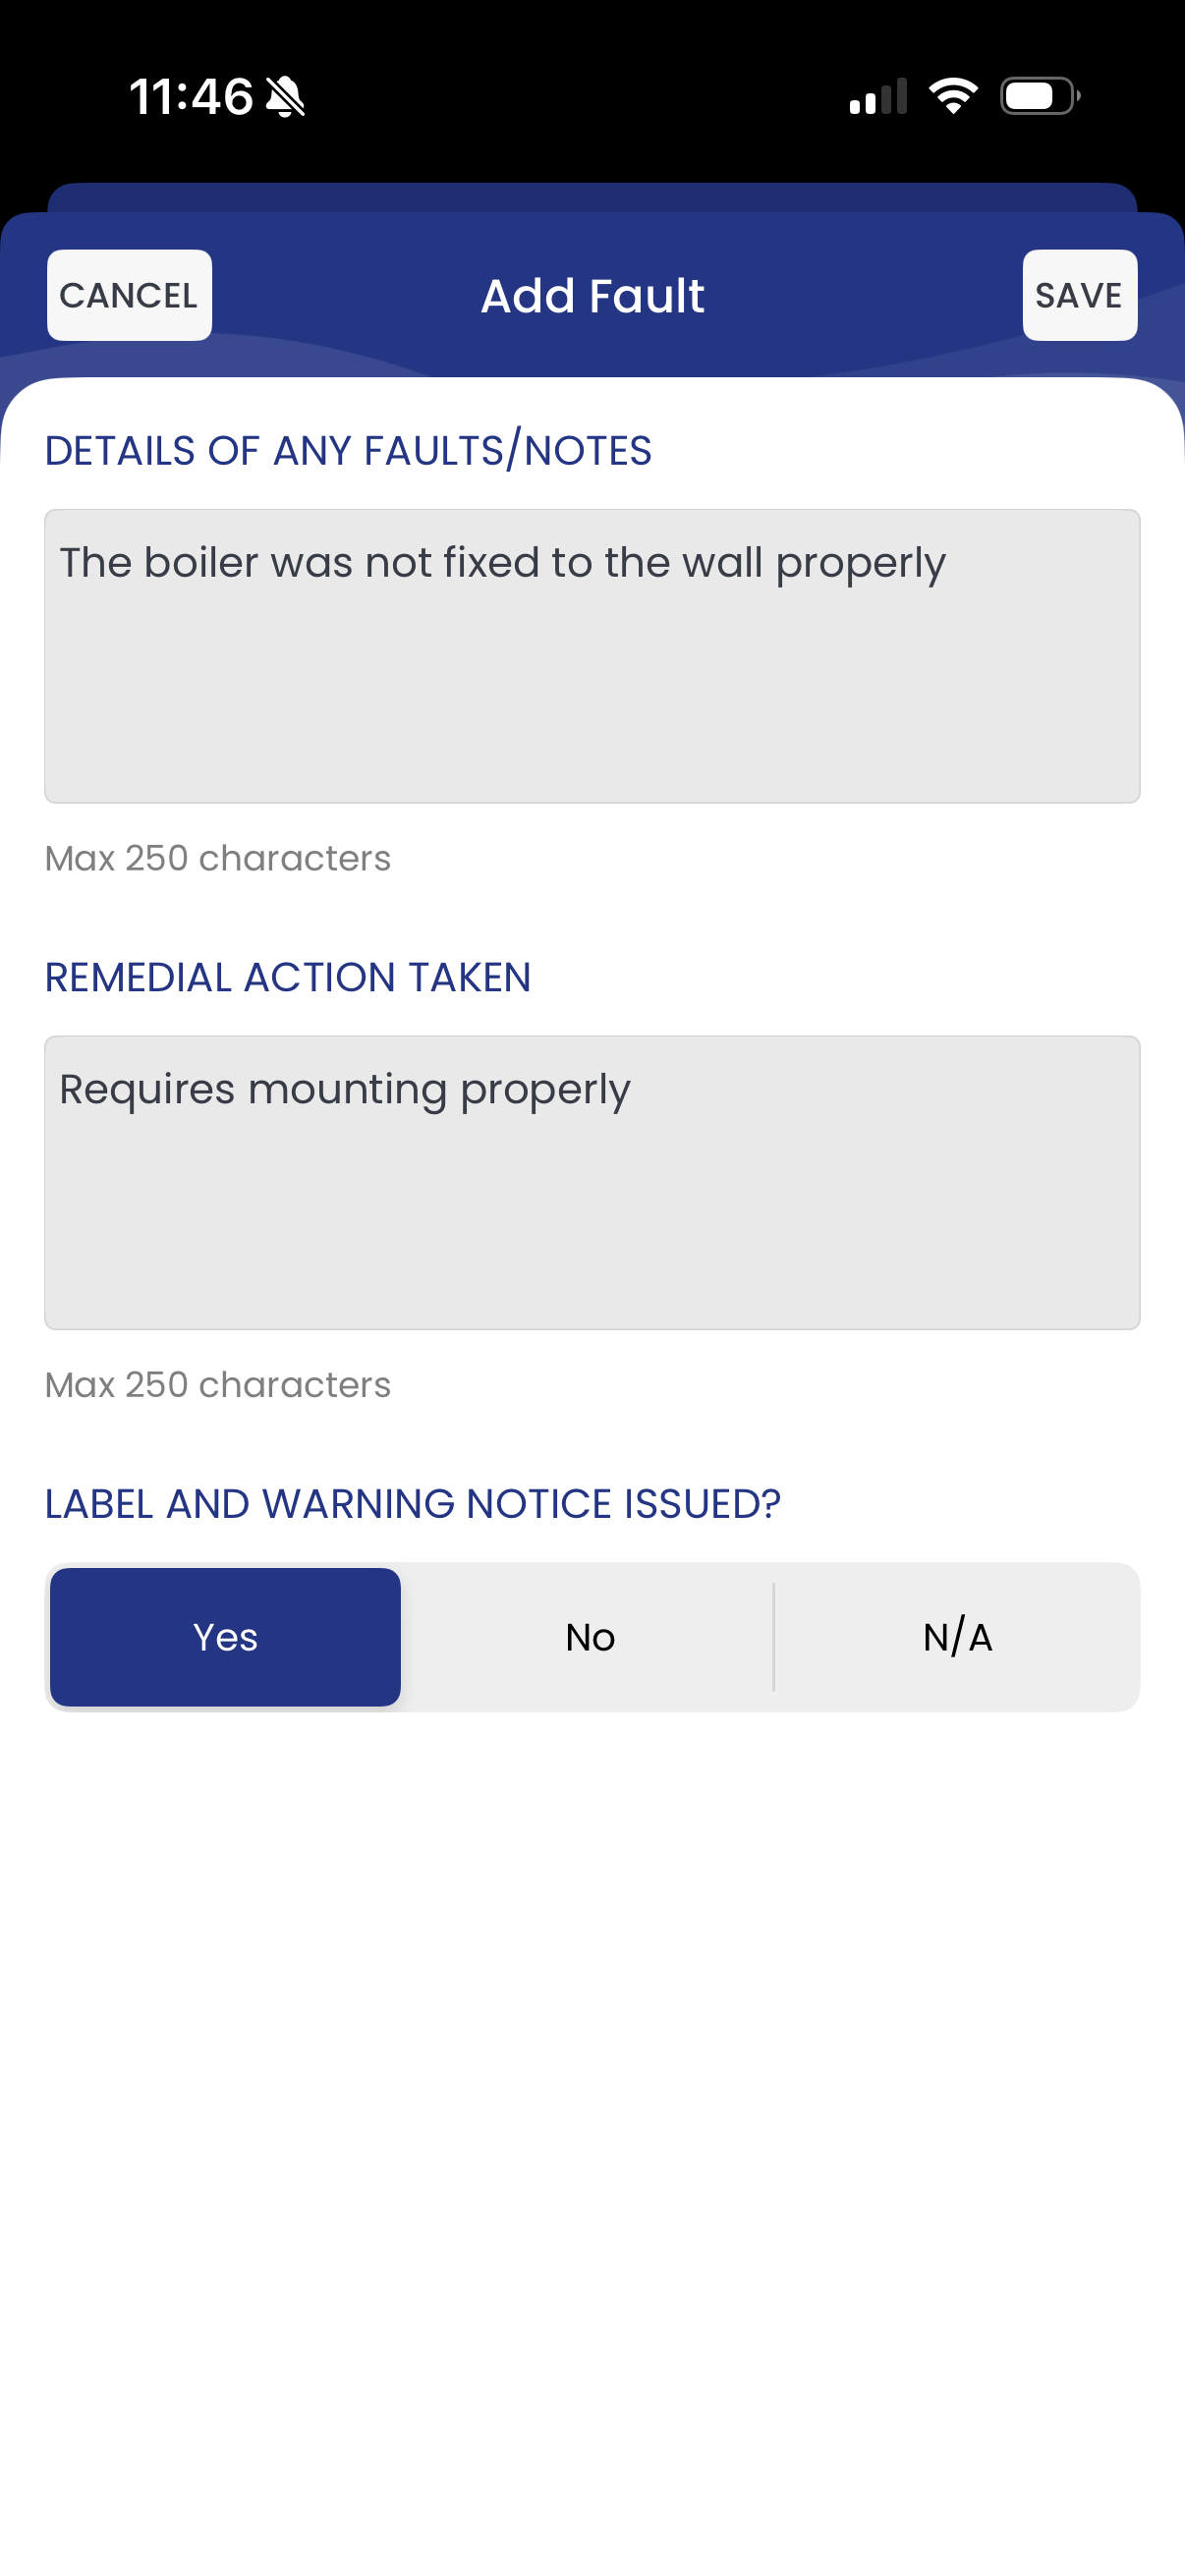
Add any faults
Log defects against the right appliance, classify them, and add free text where you need to spell something out. No faults? Move straight on.
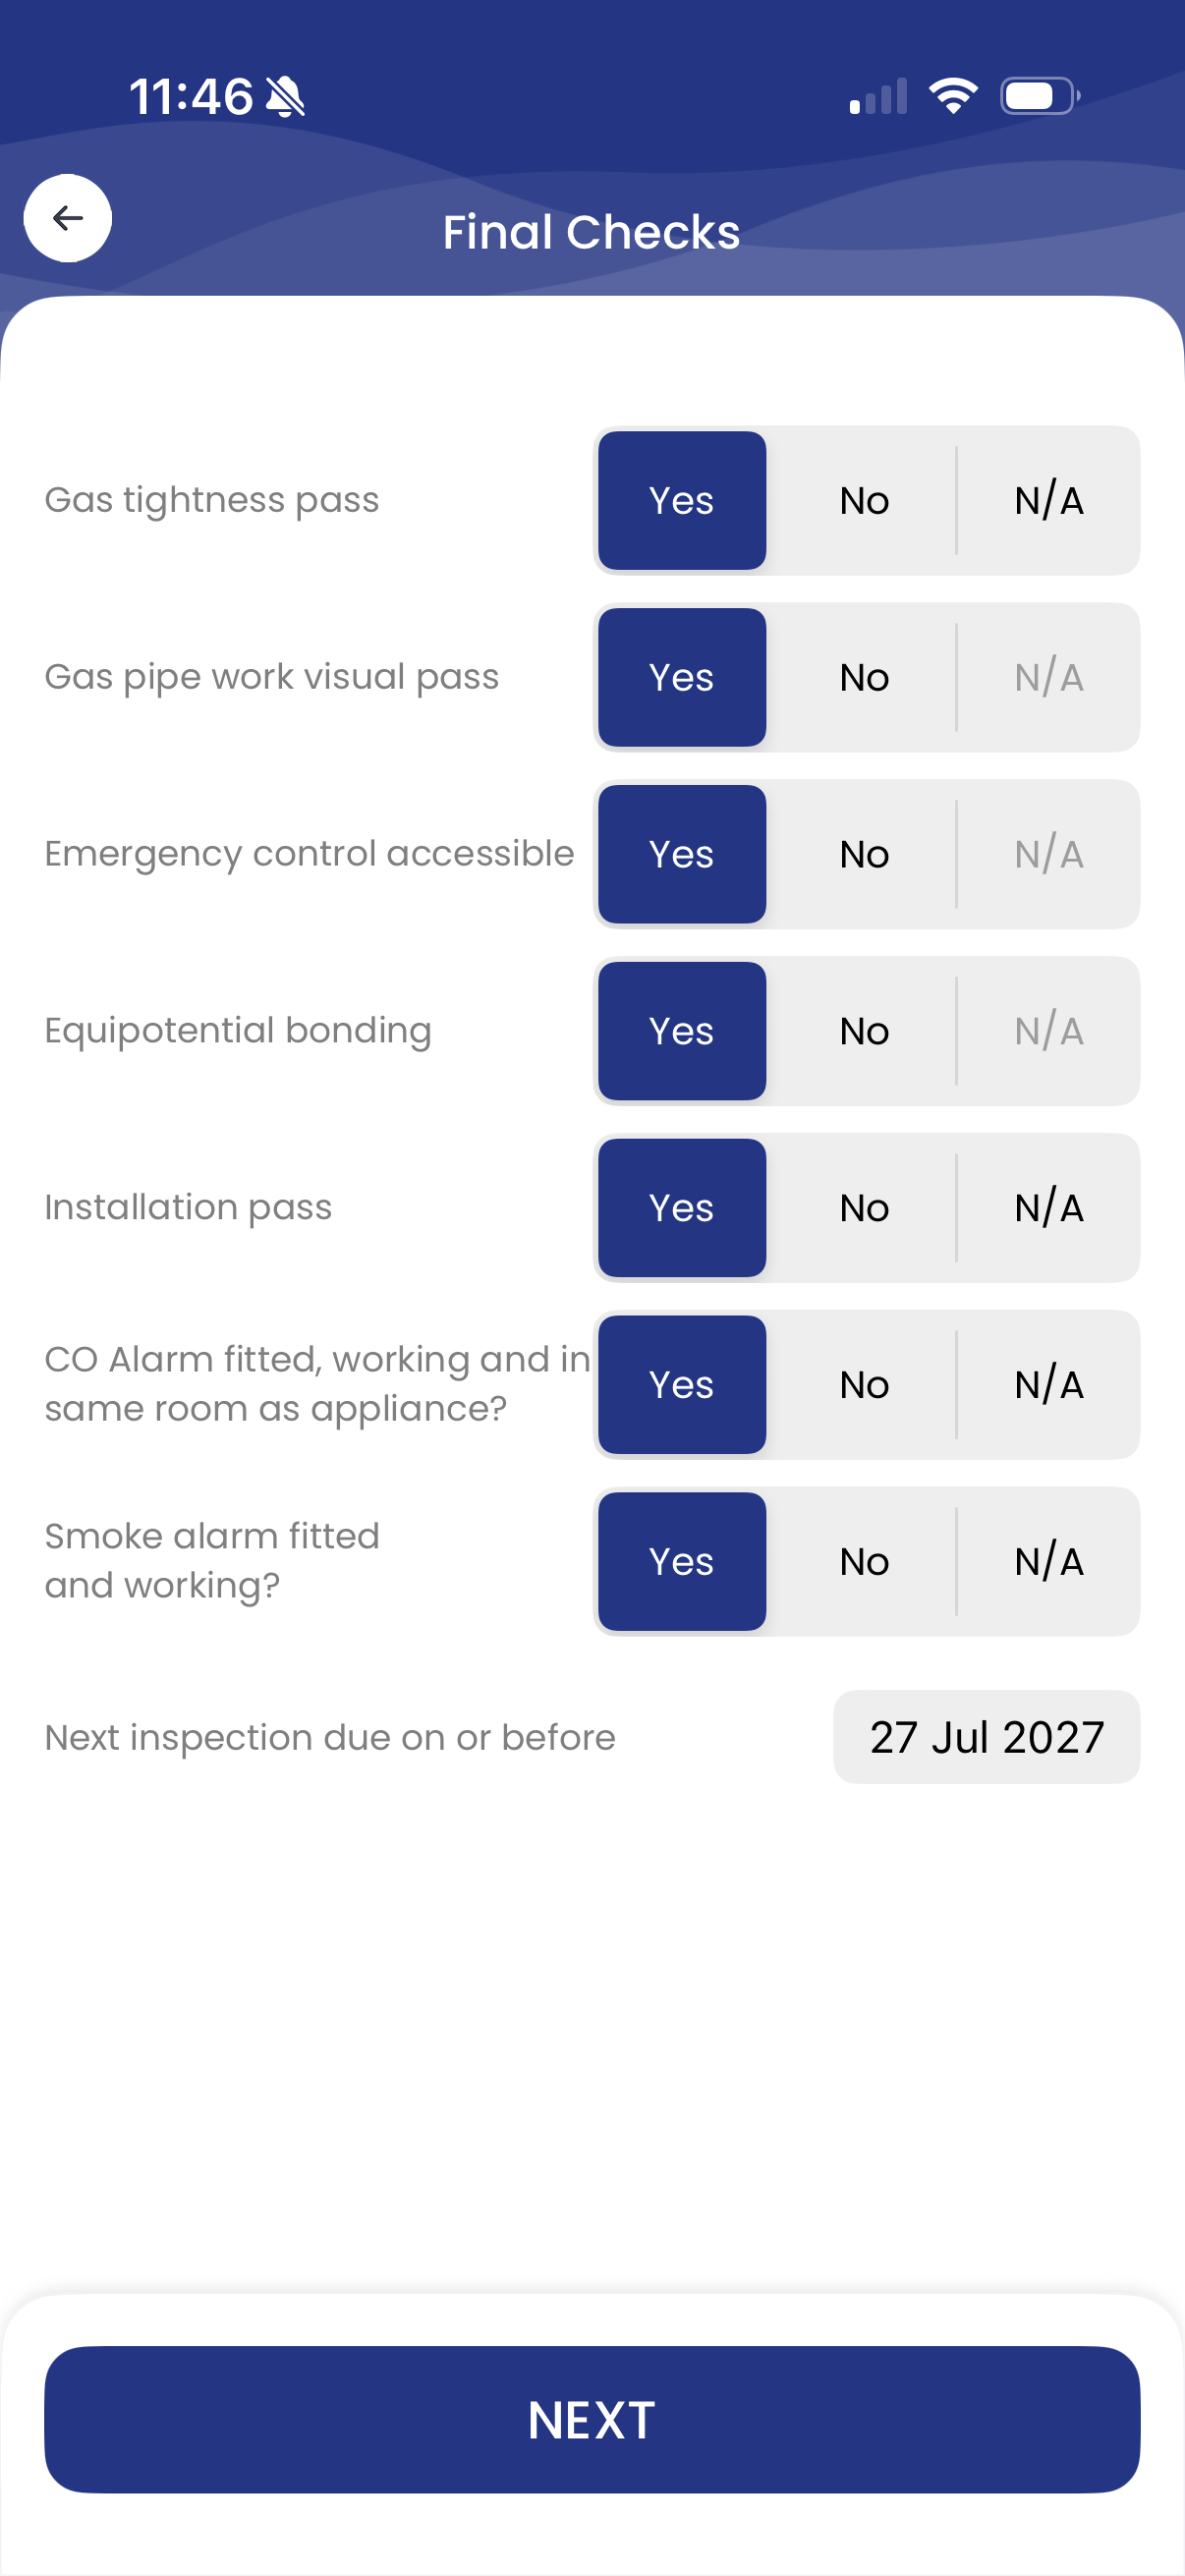
Add the final checks
Emergency control valve, gas tightness test, CO alarms, the lot. Tick them off as you go – anything you enter appears on the PDF exactly as typed.
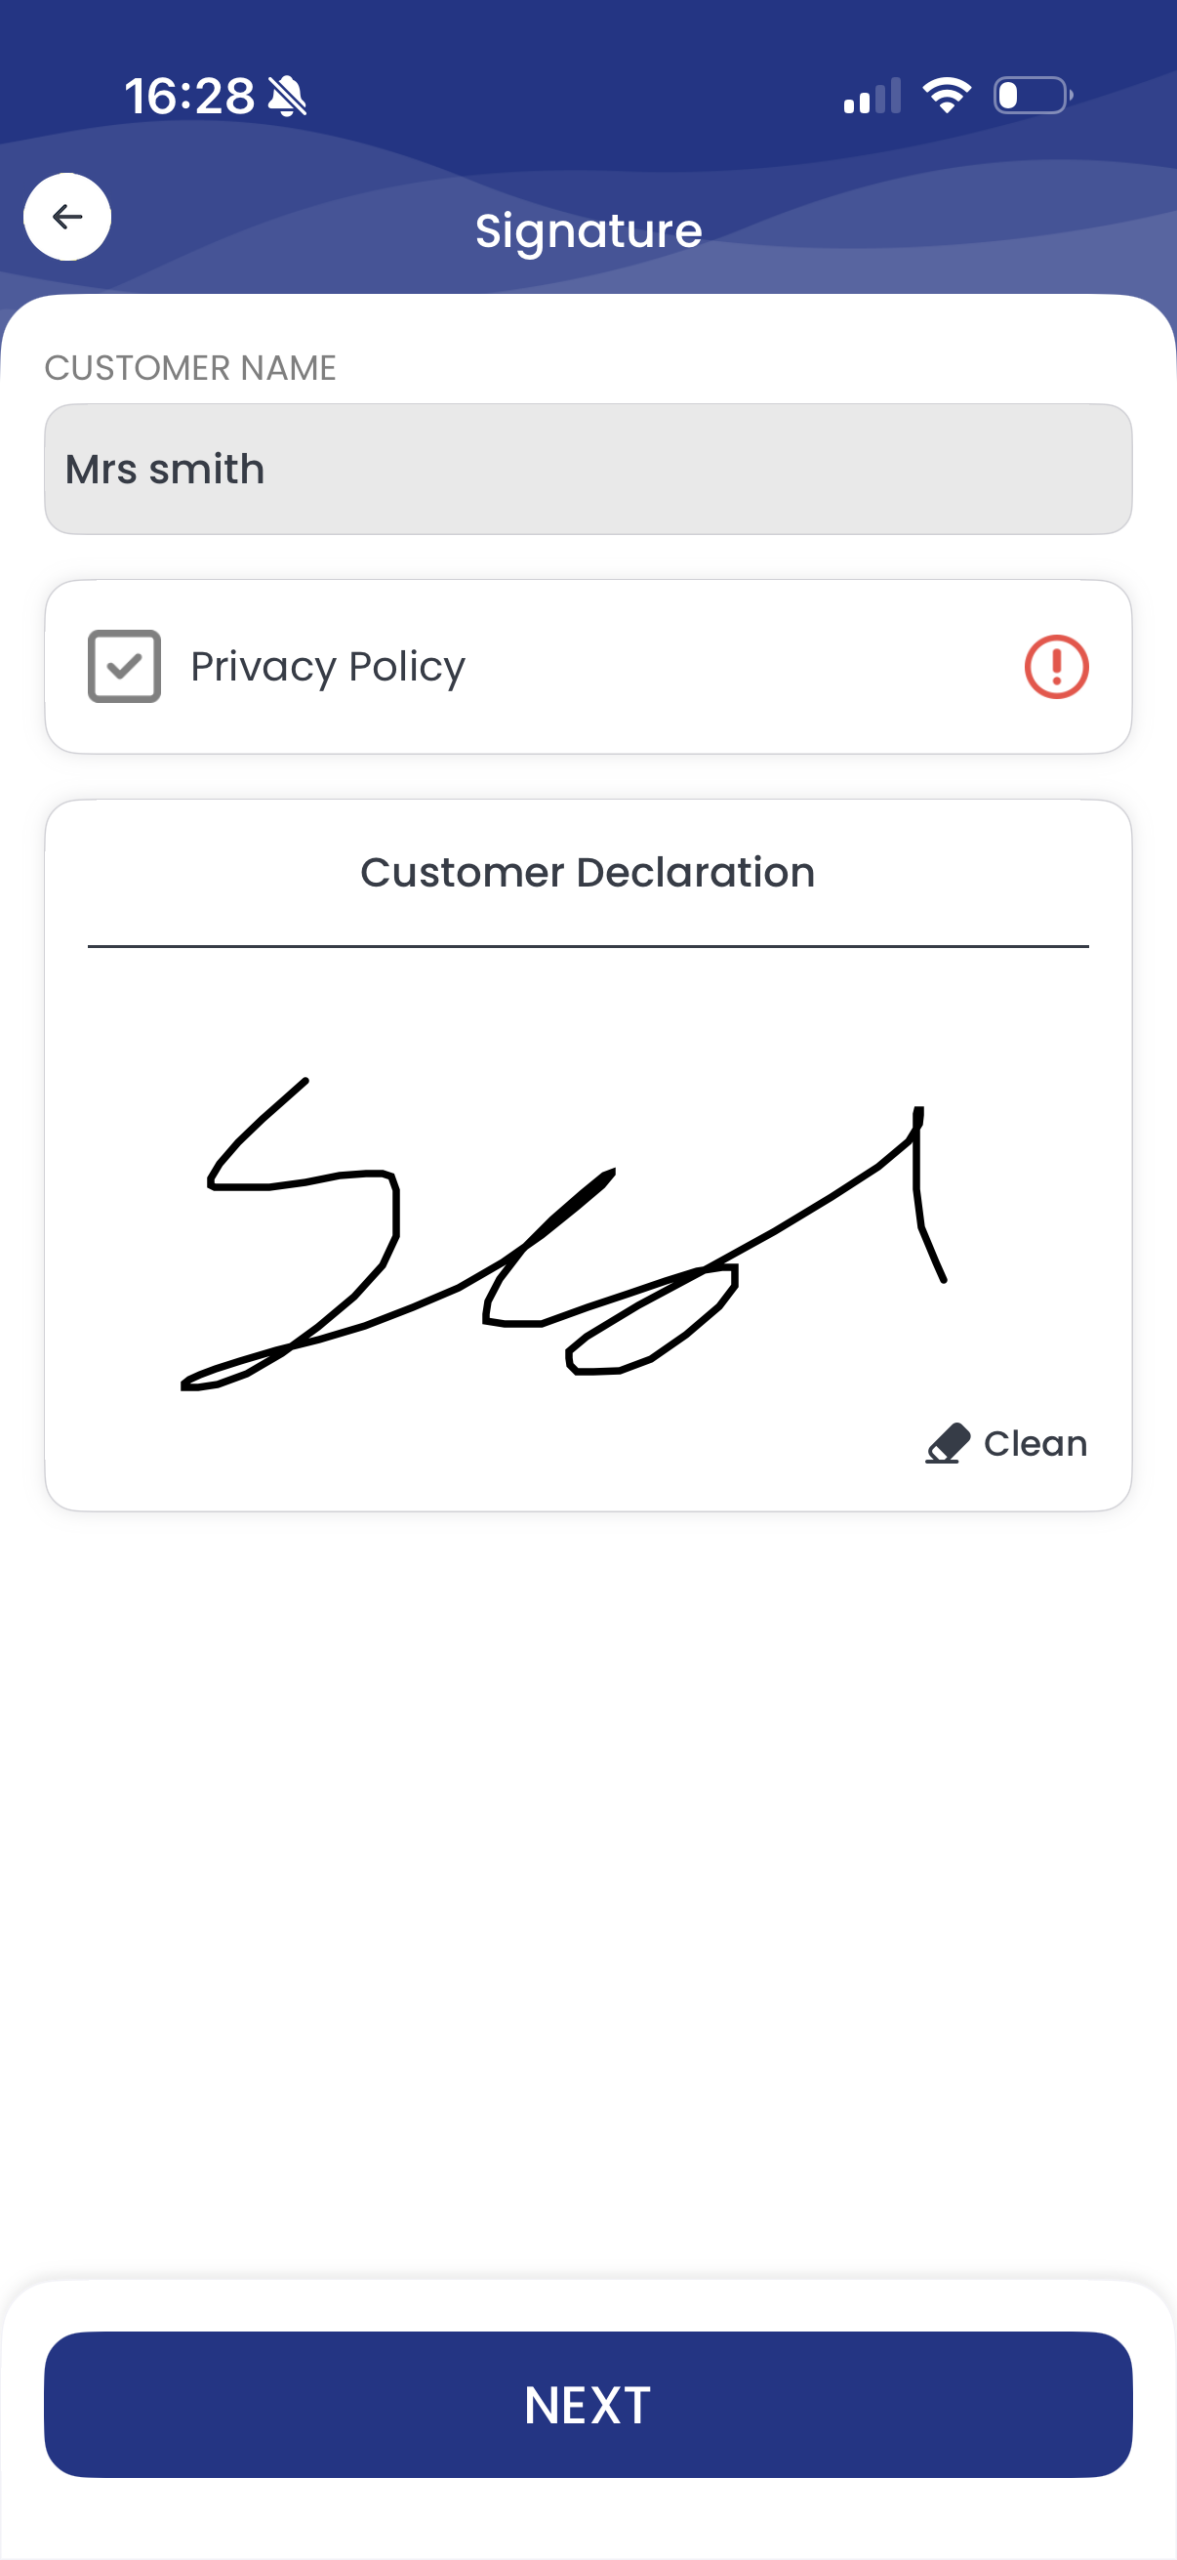
Customer signs
Enter your customer’s name, tick the GDPR opt-in, then hand the phone over for their signature. Both signatures embed straight into the PDF.
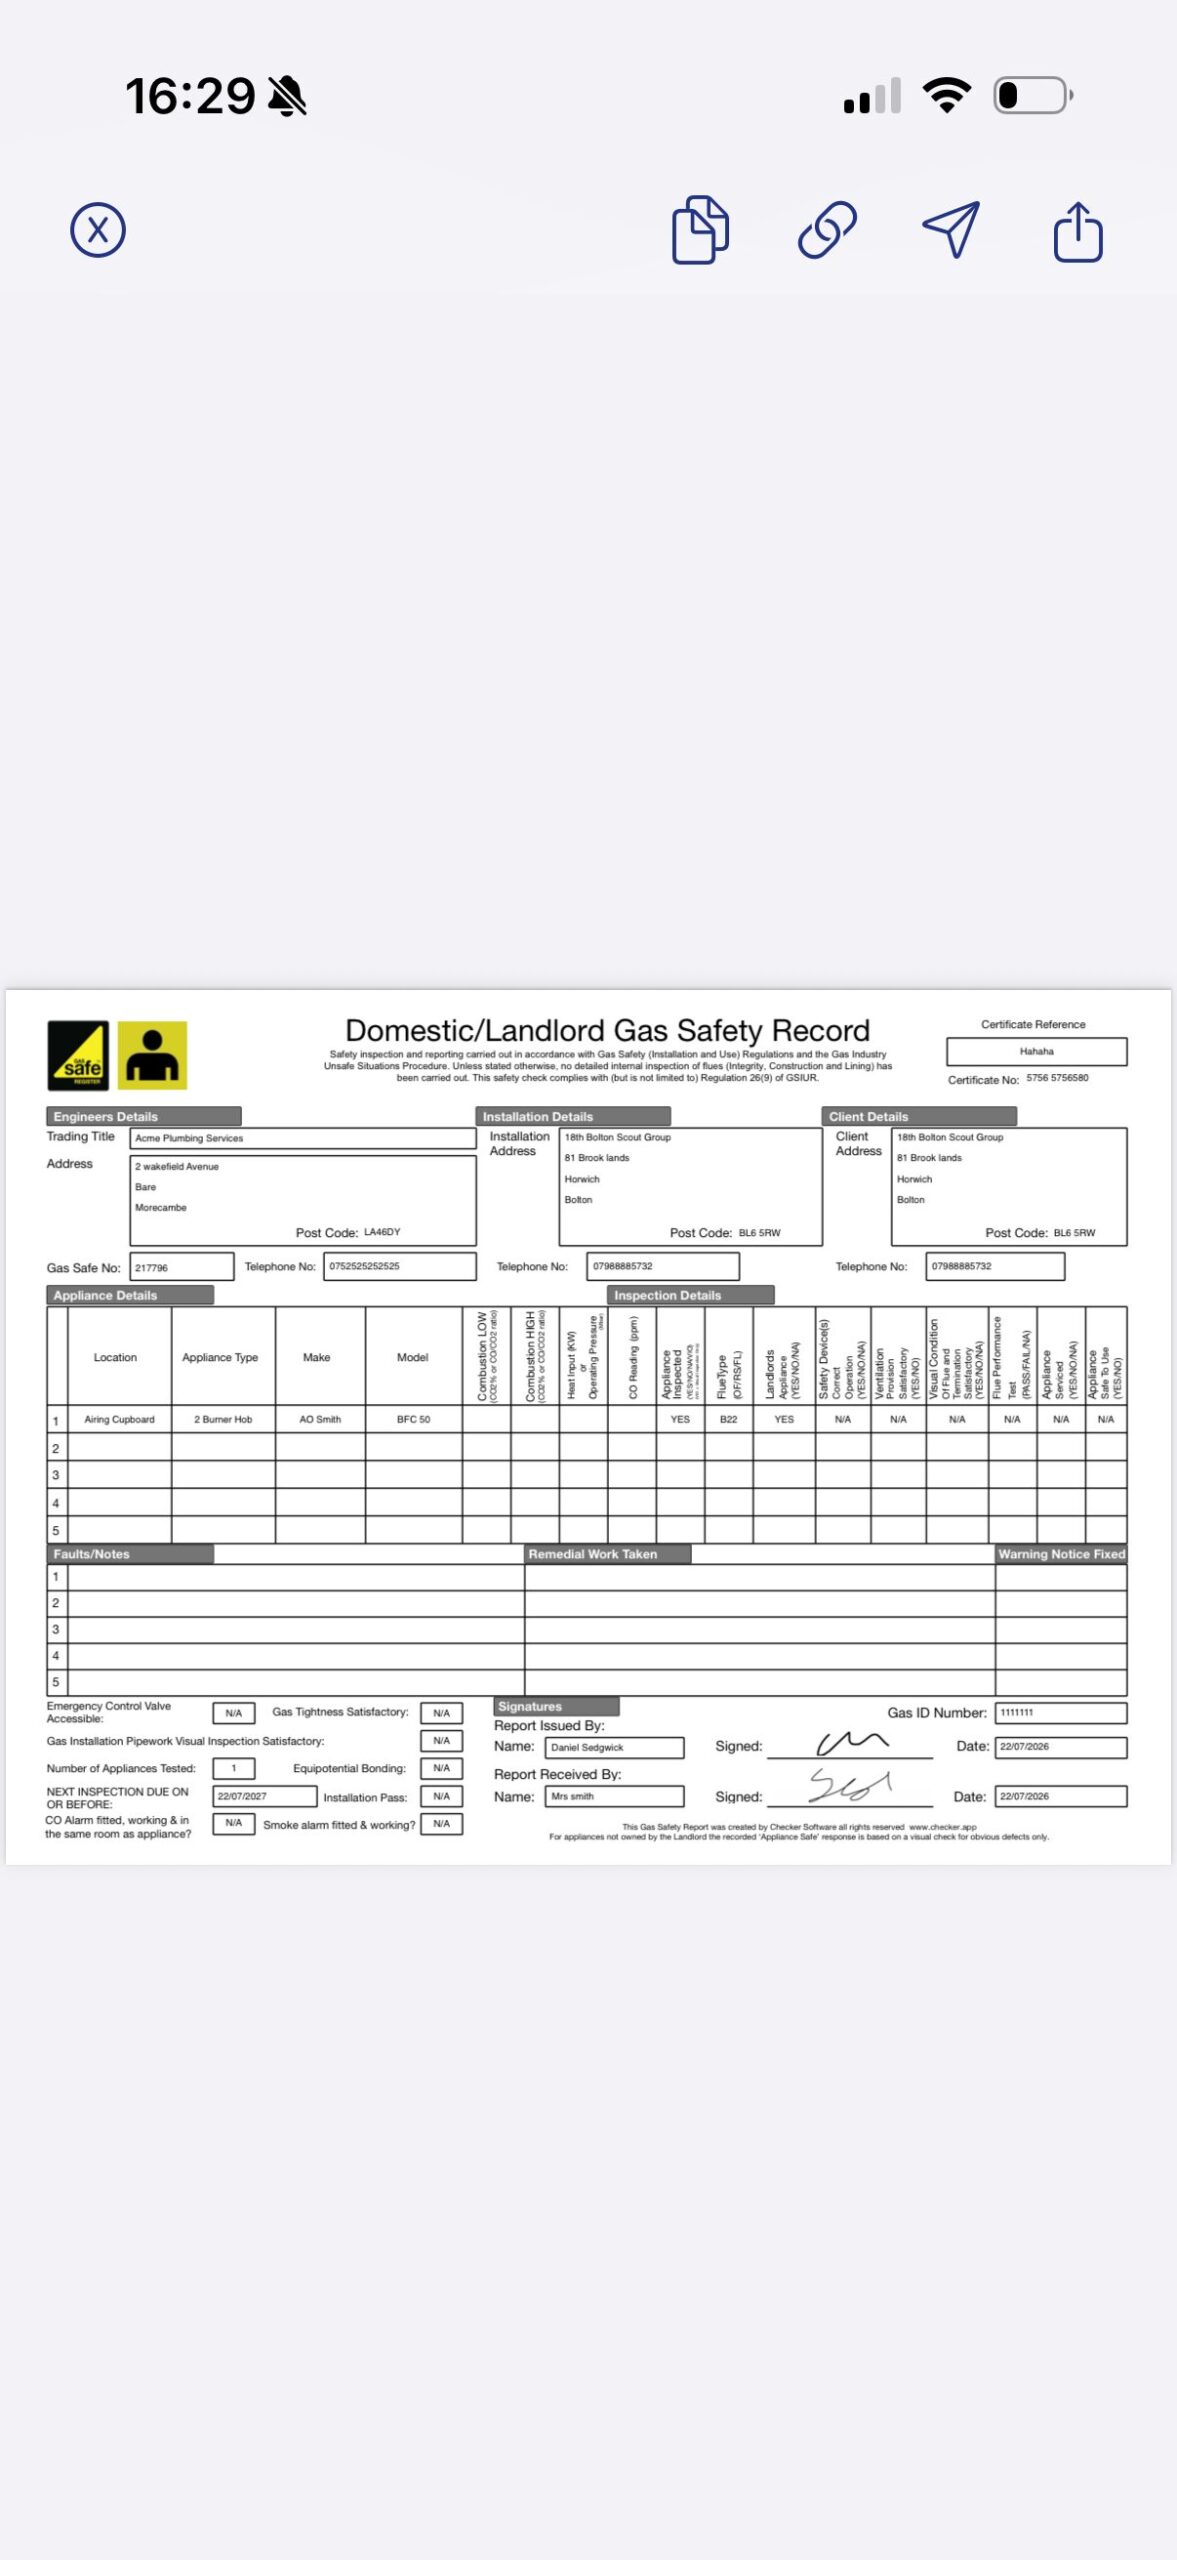
Preview it, then share
Have a quick look through the finished PDF and check every detail reads correctly. Happy? Pick how to send it – email, SMS or Checker email, whichever your customer prefers.
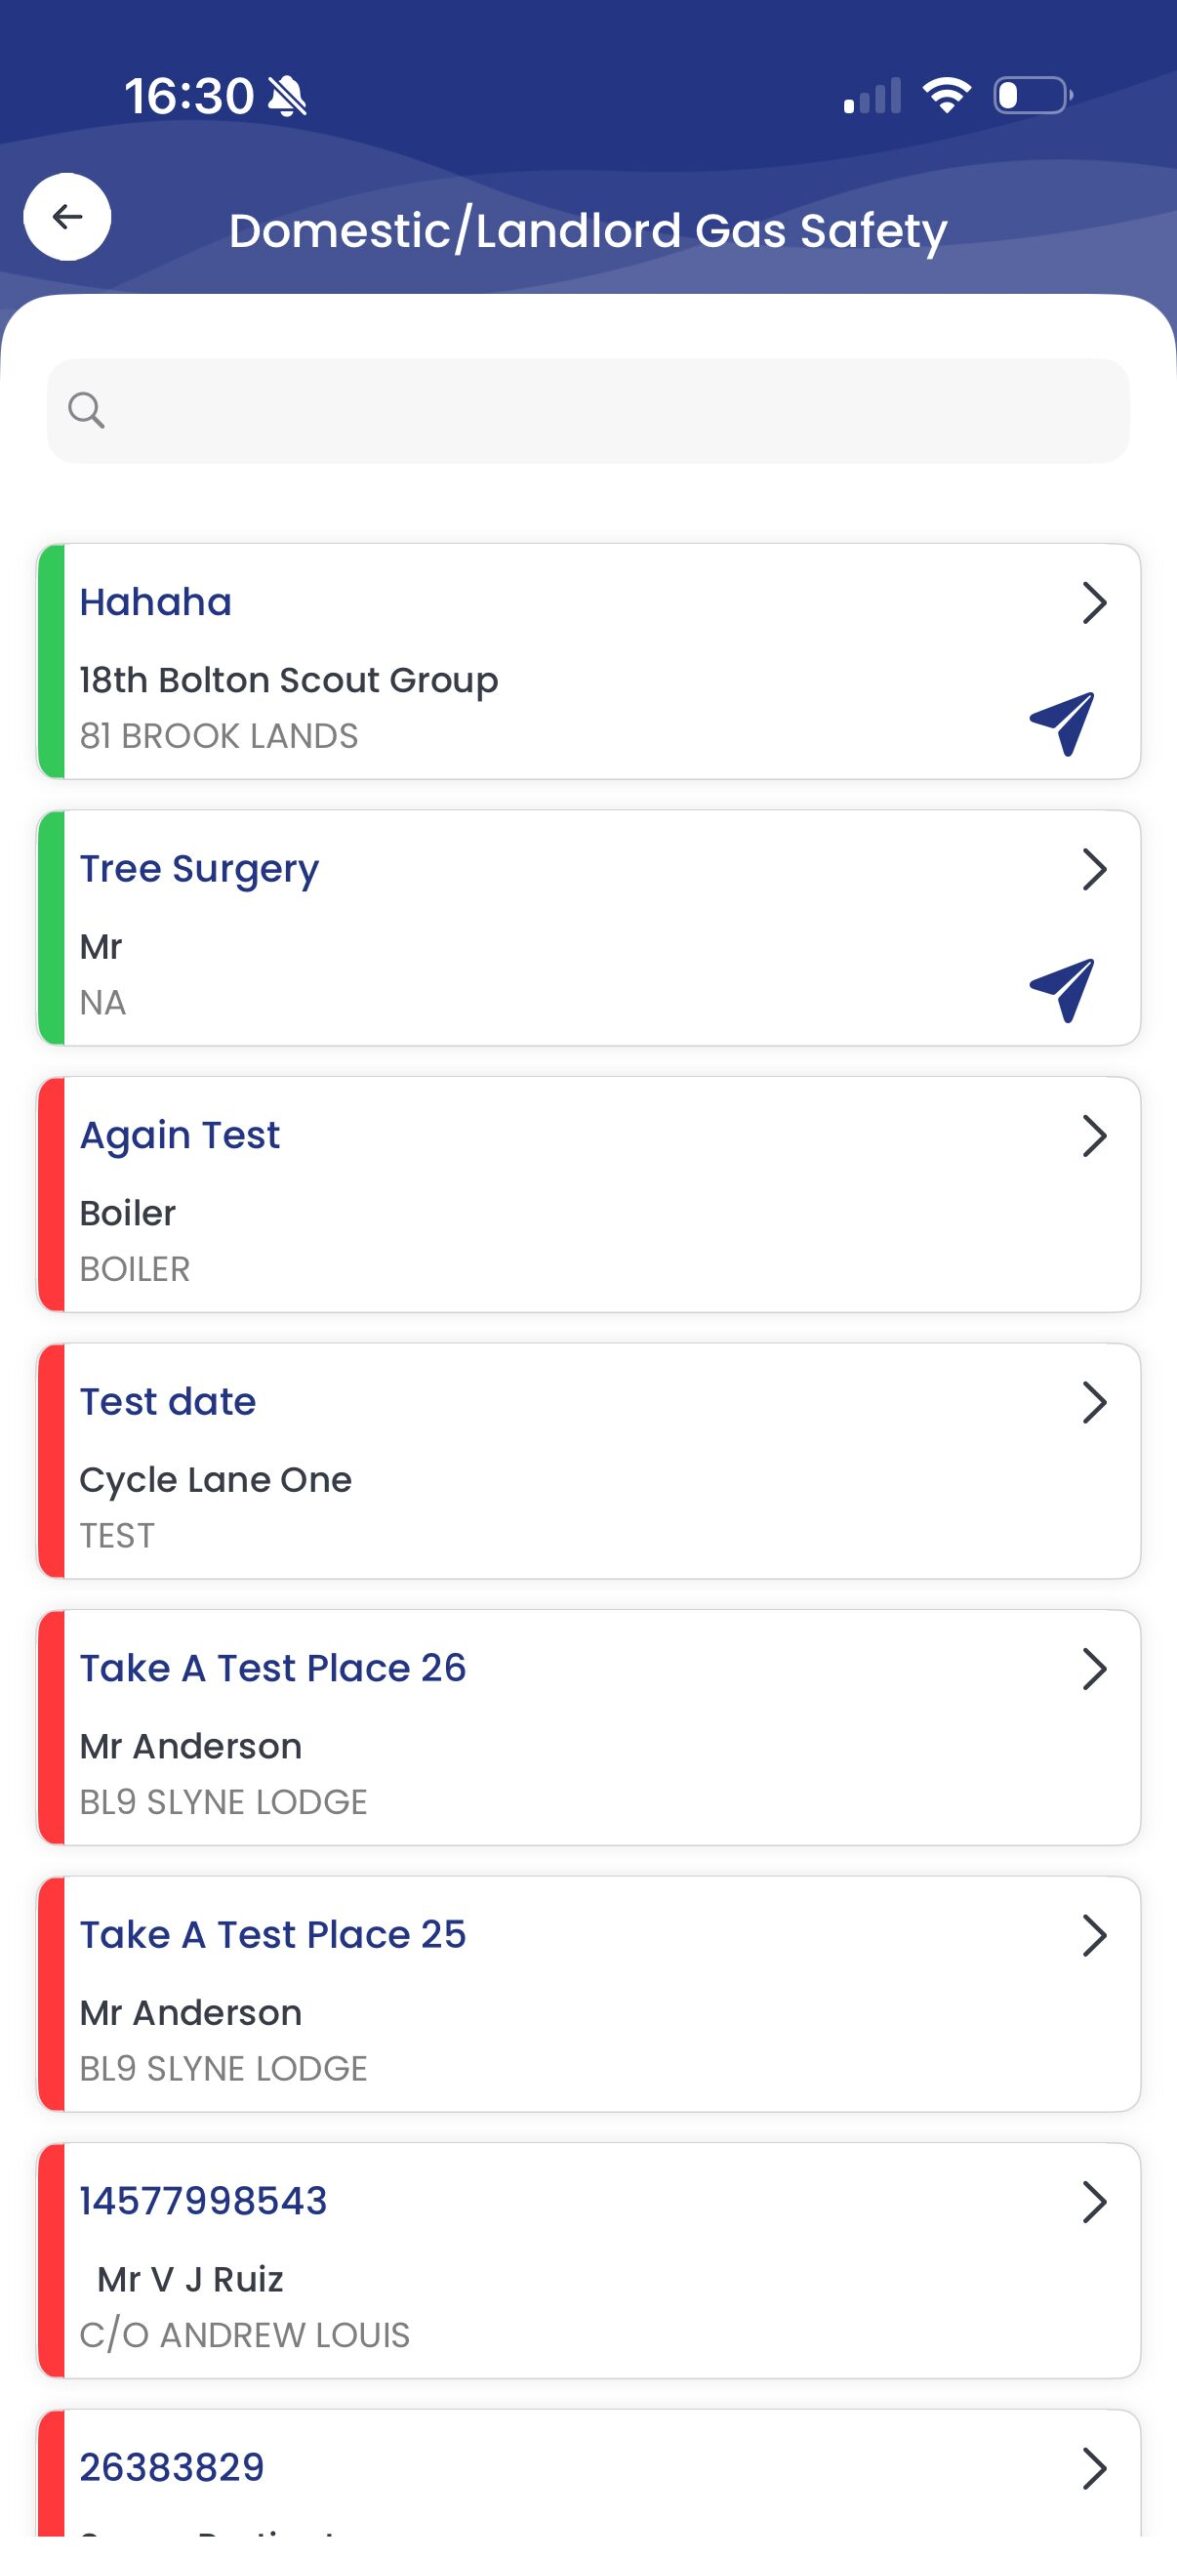
Saved, filed and synced
The cert drops into its folder and syncs to every device you’re logged into. It shows a paper-plane marker and turns green – your visual cue that it’s out the door and in good shape.
You did it.
Your certificate is saved and synced across every device you’re logged into.
Every future certificate follows the same flow: new file, fill, sign, send – about two minutes.
Frequently asked questions
Do I really need to finish Settings before my first cert?
Yes – it takes two minutes and saves you time on every future cert. Certificate numbering, VAT, your logo and branding all flow from Settings. Fill them in once, tap SAVE in the top right, and you’ll never think about them again.
What should I use as the certificate reference?
The reference becomes the saved PDF’s filename. Most engineers use the first line of the address, postcode and year – for example “10 High Street LA1 1AA 26”. Makes it easy to find later and easy for the customer to spot in their inbox.
What if I haven’t created a job for this yet?
Skip the job tag at Step 3. You can raise the certificate standalone and link it to a job later if you want. Nothing breaks.
How long does a Landlord Gas Safety Report actually take?
About two minutes on the phone once your Settings are done. First time round you’ll also type the customer’s details in, but those save automatically – next visit their whole record comes up as you start typing the name.
Do both signatures need to be on the phone?
Yes – Checker signs the PDF directly, so you sign with your finger then hand the phone to the customer for theirs. Both signatures embed into the certificate PDF.
What happens after I send it?
The file syncs across every device you’re logged into. Eleven months later, Checker automatically emails your client to rebook – and you get an email notification too, so nothing falls through the cracks.
Related
Try it on a real cert today
Free for 30 days. No card. Cancel anytime.
Start your free trial →Fancy a hand instead? Grab 15 minutes and we’ll do your first certificate together, on one of your own jobs.
Schedule a demo No pitch, no pressure. Only if you want it.Quick question? Mon to Fri, 9am to 5pm.
Chat on WhatsAppGet the app
Rather someone walked you through it? Book 15 minutes.